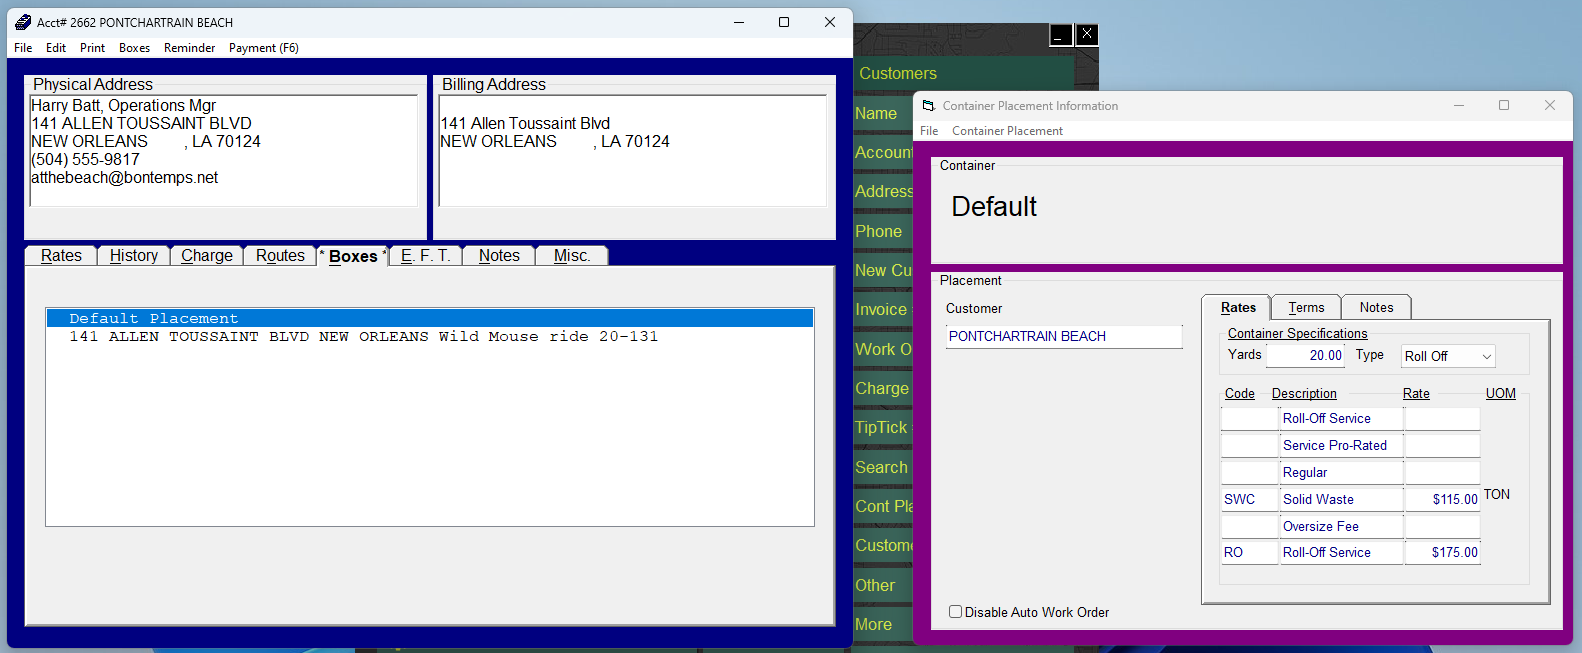
This article explains how to use the Default Placement ability in Trash Flow.
Before You Begin
You must have the Container Tracking module; if you own this module each customer account will have a Containers tab.
Context
Sometimes customers end up using many boxes across different locations. Default placements are meant for situations where a customer is always getting the same type and size of container—think of a construction company that contracts with you to provide a 15-yard roll-off container at a negotiated rate on all their jobs across the county, or an HOA who wants to set up 800 identical carts for residents. This article will tell you how to create a default placement, explain how Trash Flow uses that default, and tell you how to remove a default placement from the account if necessary.
Create a Default Placement
- Open a customer account and navigate to the Boxes tab.
- Right-click within the tab OR click in the top menu; click .
- Double click the Default Placement.
- Set the options desired here. You can set the container size and type, enter any rates, set weight and rental options on the Terms tab, and enter any desired Notes.

Understanding the Default Placement
Anytime you create a new container placement on this customer's account it will automatically fill in the available information from the Default. None of this is set in stone—you can always edit the information on the new placement—but it's a handy shortcut when you have a customer who gets many of the same variety of container.
Remove a Default Placement
- Open a customer account and navigate to the Boxes tab.
- Double click the Default Placement.
- Click Container OR press F7.
