Routing
Understanding the Route Window
Trash Flow offers a Routes module to help you plan trash pickups in an efficient, profitable manner, then print route sheet for your drivers to follow or make that information available on tablets. Routes in Trash Flow appear as a separate window with a gray background. There's no menu bar across the top of this window; all the route options are accessed by right-clicking your mouse to bring up a menu. You can right-click anywhere in this screen to bring up the menu—just keep in mind that if you want to edit a specific stop on the route, you should right-click on that stop to bring up the correct information.
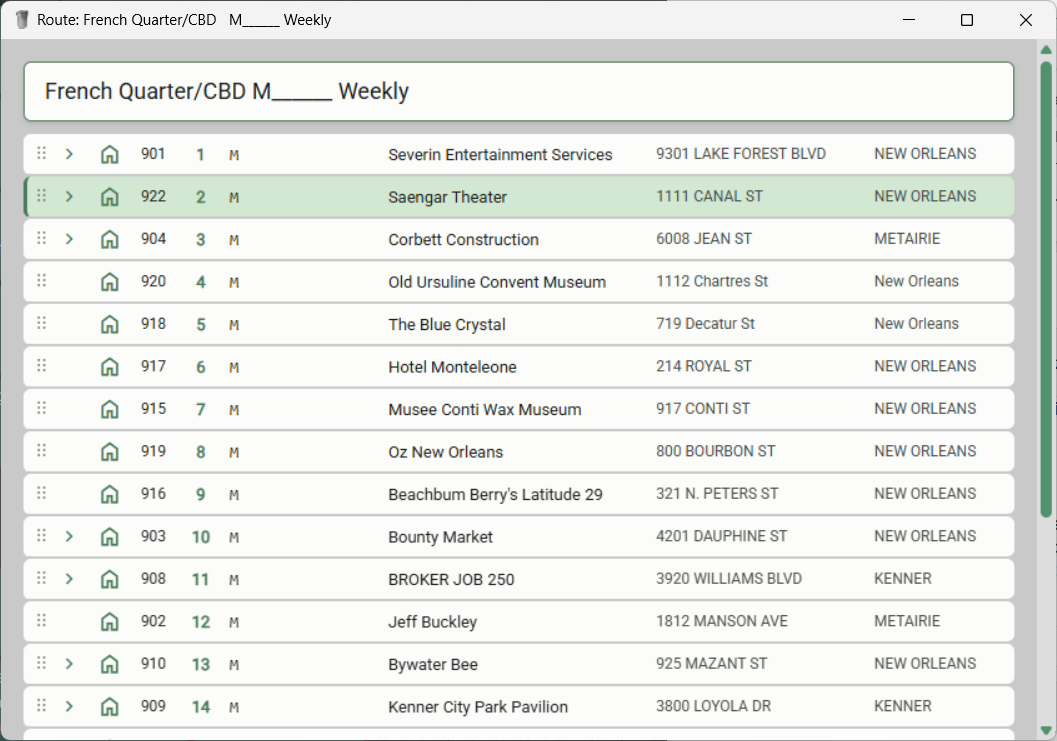
A route in Trash Flow is listed in the order of stops. The first column may show a caret (>) next to some stops; click this to expand the entry and view notes about the stop and/or containers at this location. The next column shows the Trash Flow account number. The next column is the stop number—that is, the order in which the stops will be made. There may be a column before the customer name showing what day(s) the pickup should be made. Note: If a number appears after the stop day, that number indicates the number of weeks to skip this stop for pickup. The final column displays the customer's name and address.
You can move stops by "drag and drop": click the six-dot graphic on the left and hold down your mouse key, move the cursor to where you want to move the stop, and release the route button. If desired you can disable this function so stops don't get moved accidentally. To toggle this ability on or off right-click anywhere within the route window and click Drag and Drop unlocked / locked.
Navigating the Route Menu
Right-clicking in the window and clicking displays all the container information and special notes about a route. Clicking hides those extra lines. To change the name of a route, right-click your mouse in the Routes window, click , type your new route name in the box, and click .
Trash Flow can also remove all the customers and notes from a route. You can use this function to clear out old routes, or it can be used for temporary routes. Be careful here; if you remove all stops from a route, it cannot be undone. To clear the route, right-click in the Routes menu and clicking . You can also set route information, add stops, print route sheets, edit stops, and create work orders for a route within the Route window.