Create a Posting Report
The posting report is a list of transactions within a given date range. It is one of the most common financial reports to run in Trash Flow and can include charges, payments, invoices, taxes, credits, write-offs, deposits, and other types of transactions. This guide explains how to create the report. It includes a sample report at the bottom.
Before You Begin
Any version of Trash Flow that includes billing can create a posting report.
Common Uses
The posting report is very customizable because it gets run for many purposes. Some example uses of the posting report are listed below.
- See how much money you’ve taken in so far this year;
- Check what you billed out last month;
- Count the number of charges you made for a particular service;
- Review all the charges and payments entered by a particular user;
- Compare your residential revenue to your commercial revenue;
- (with Trash Billing) Confirm how much in credit card payments were reversed so far this year;
- Check how much you owe in taxes for a given month or quarter;
- See how much money you're making in a given town or county;
- (with Trash Billing) Compare how much you're being paid via electronic payments vs. cash and checks.
Create the Report
- Go to Reports > Financial Reports > Posting Reports > Posting Report
- Set the desired date range using the Start Date and End Date fields.
- Use the filtering options to pick whether you want to include all customers or only some. See the list of filtering options below for more information.
- Use the data display options to choose which transactions you want on the report. See the list of data display options below for more information.
- Change the output settings if needed; see below for more information.
- Click to preview and print.
Posting Report Options: Data Filters
As with many Trash Flow reports some of the options here filter which customers should be included.
- Account Type: Chooses whether to include residential, commercial, contract, or all customers.
- Sales Tax District: Chooses whether to include customers from a specific sales tax district or from all districts.
- Source Co.: Chooses whether to include customers from a specific source company or from all companies.
- Bill Codes: Chooses whether to include customers assigned a specific bill code, all bill codes, or no bill codes.
- User: Chooses whether to include transactions entered by a specific user or by ALL users.
- Billing Group: Chooses whether to include customers in a specific billing group or in all billing groups.
- Geographic Region: Chooses whether to include customers in a specific geographic region, all geographic regions, or no geographic region.
- Business: Chooses whether to include customers of one of your businesses or customers of all your businesses.
- Salesperson: Chooses whether to include customers from a specific salesperson, from all salespeople, or from no salesperson.
Posting Report Options: Data Display Settings
These options choose which transaction details to include on the report.
- Detailed Credits/Write-offs: Chooses whether to include a detailed list of credit transactions.
- Show Tax Report: Chooses whether to print an extra page at the end of the report detailing a breakdown of taxes charged and taxes paid for each fee description in every sales tax district.
- Charge Types: Chooses whether to include or exclude regular payments, web payments, real-time payments, and EFT (autopay) payments. This option is only relevant if you use our Trash Billing service to process electronic payments.
- Detail Cost Charges?: Chooses whether to include a detailed breakdown of landfill, truck operation, and other company costs (as opposed to charges actually made to customers).
- Show Bill Group: Chooses whether to list the bill group of the customer when listing detailed transactions.
- Detailed Payments: Chooses whether to include a detailed list of payments to each account.
- Detailed Other Charges: Chooses whether to include a detailed list of charges (not payments, credits, or write-offs).
- Standard Charges: Chooses whether to include all standard charges, no standard charges, or only one type of standard charge. “Standard charge” here refers to different types of transactions entered on customer accounts: payments, miscellaneous charges, materials entries, etc.
Posting Report: Output Settings
By default the posting report always lists transactions in chronological order by business date. The Sort option lets you break down the posting report by account type, bill group, or tax district (a section for all the monthly customers, another for all the quarterly customers, etc.). You can also sort first by Charge Type, then Date; by Charge Type, then by Customer; by Customer, then by Charge Type; or by Customer, then by Charge Date. The Format menu tells Trash Flow what to do with the data you want to see. It defaults to creating a PDF.
- Print to PDF: This default option displays a PDF in your computer's PDF reader.
- Details CSV: This option creates a CSV file that can be opened as a spreadsheet. Once you click OK on the report a window appears with all the fields available for the report. Select one you want and click. Repeat until done, then click . Click here for more details on creating a CSV.
- Summary CSV: This option creates a CSV with the total amount entered for each charge type and bill code within the date range. It shows the number of transactions for each charge type, the total dollar amount, and any taxes.
- Sales Tax CSV: This option creates a CSV to check tax amounts. It has many of the usual Trash Flow fields like customer name, bill group, etc. The crucial distinction is in columns P and Q: each line is a payment amount and tax during the date range.
When You're Done
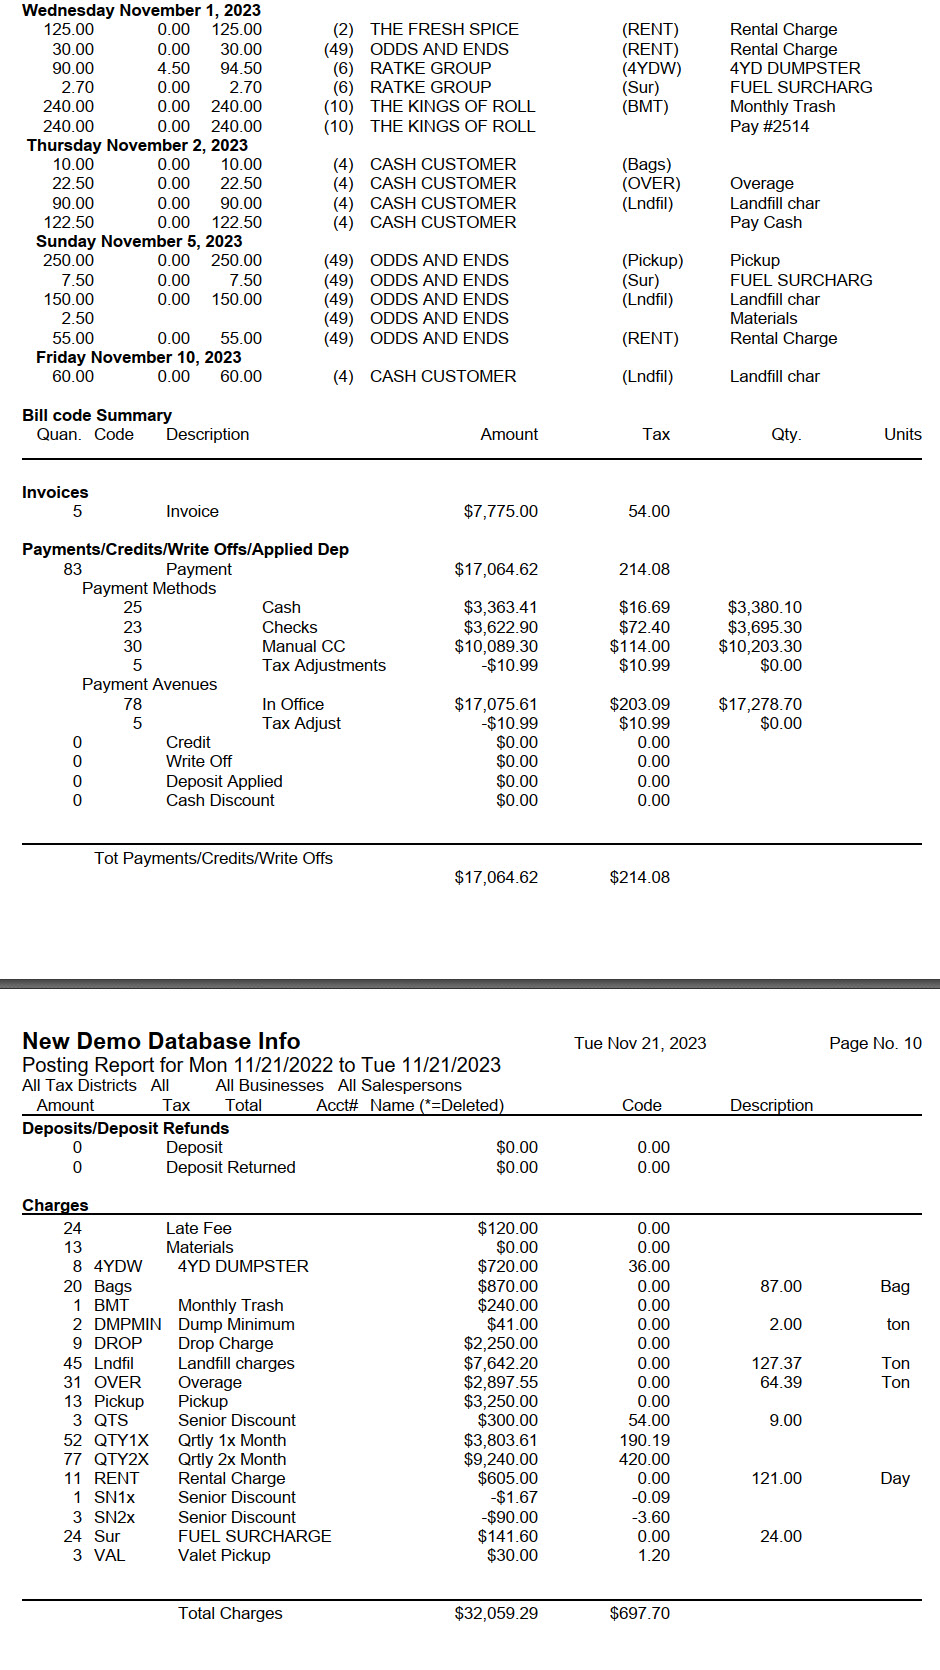
The posting report always shows the totals of all invoices, payments/credits, and charges within the date range given for the set of customers selected. It gives the number of transactions made and the total amount in each transaction type. Payments are broken down into both method of payment (check, cash, credit card, etc.) and "avenue" of payment (whether the payment was entered in the office, online, as part of an autopay batch, etc.
If you chose to sort by bill group, account type, or sales tax district then each section displays its own subtotal of invoices, payments/credits, and charges. The end of the report includes a summary of all transactions as usual.
For Trash Flow Mobile users: Report options on Trash Flow Mobile will work just as described in this article and appear in the same order. The user interface is slightly different to accommodate how we use tablets and phones; for more details, or to learn more about accessing your data from a phone or tablet, see Using Trash Flow Mobile.
Further resources
Trash Flow has several ways to get a list of payments recorded for a given day or a range of dates.
- The posting report is the most widely useful report for financial information, giving a detailed list of all charges, payments, and credits.
- The deposit slip lists detailed check payments and a total cash amount; it's meant to be printed out and taken to the bank along with a deposit slip and the money for the day.
- The entered deposit report is almost the same as the deposit slip, but allows the user to specify a time range as well; this is used in situations where payments are recorded and taken to the bank, then more payments are entered later on the same day.
- The payment reconciliation report lets you compare each day's deposits with your bank statement to check for discrepancies.
- The payments summary report gives total dollar amounts of payments by day, week, month, or year.